The cityscape was the first thing I created for my ident. I created a plane with eight segments in each direction and converted it to an editable poly. This allowed me to select polygons and pull them up to different levels to create a block of small buildings. A third party plug in called "Greeble" was also quite good in adding small bits of detail on the buildings and also made creating the buildings from the planes much more efficient. I copied the plane several times to create a large scale city scape.
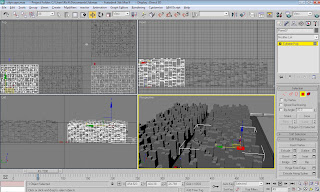
To break up the buildings I created some custom skyscraper buildings which would stand out against all the lower buildings. I also set these to be a different colour from the rest of the buildings. To make the city seem more alive I added a subway train line around the edge of the city which would have a train circling the tracks. It was made by creating a plane that fitted the edge of the city, boolean a hole
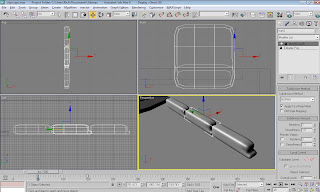
so it would fit and then indented the polys facing upwards and extruded them downwards to create the tracks. The train itself is a simple design, a box object with some added segments and a mesh smooth modifier. Also by extruding the bottom polygons on the rear side of the train this creates the train buckle which attaches the carriages together. I cloned the train twice and added them in a line.
A chrome material gives the train a realistic sleek metallic look.
I added small spheres that have been scaled length ways slightly and textured with different colours as cars that will drive along in between the city buildings. Along with the train I thought this gave the city a much more natural feel.
The next step was to create the spaceships that will fly over the city. To keep a consistency between the other ident's I imported the spaceship I modelled in my second ident and cloned it several times to create a fleet of spaceships. Resizing them was the only step I need to take to get them into position. Grouping the spaceships together as one made it easier to animate them all at the same time as well.
As the spaceships fly over the city, one of them falls from the sky and falls into the city below.
To finish the cityscape scene I added a bright sky background to the scene and created a hilly landscape to go around the city instead of the landscape being flat and unrealistic. The landscape was created using the same method in the first ident. Creating the map within Photoshop or using a noise map on the displace modifier then by changing the strength you can create the landscape. A mesh smooth modifier smooths the landscape out.
From here the scene zooms out into the next part of the ident where we see the city and spaceships was just a video game been played by an ipod sitting on a sofa.
The furniture in this scene was made from planes and boxes and not all that complicated. The television was made very similar to how I made the computer screen in my second ident. By creating a large thin box object, indenting the centre polygons and extruding back into itself.
I saved a still render of the spaceships attacking the city and loaded it back into 3DS MAX as a texture used for the television screen.
UVWMapping was used to fit the texture onto the screen properly.
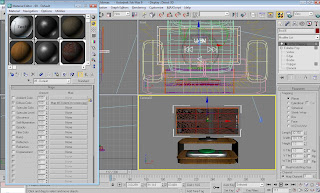
The item of furniture holding the TV was made from cloning a mesh smoothed thin box object multiple times and putting them back into position.
The lamp is made from a thin cylinder with a bend modifier to make it lean over to one side, the lampshade is made from a cylinder being bevelled.
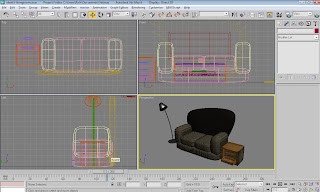
The sofa was made using multiple box objects and applying mesh smooth modifiers to make them appear soft. The back to the sofa was made using the pen tool as I wanted an odd/cartoon like shape for the back of the sofa.
I used the smooth settings with pen tool and then converted the completed spine into a polygon, which I extruded and then capped the other side so the backside wasn't see through.
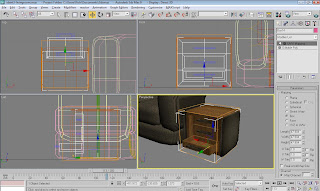
The little table by the side of the sofa was made in a similar way to the TV furniture. the only difference is the the drawers. These were made by selecting the polygons in a row and indenting then extruding. For the bottom draw I extruded the polygons out and then selected the polygon facing upwards and indented a few pixels then extruded down in on itself creating the draw space. The handles were
thin box objects that were then booleaned in the middle to create the handle. I used a UVWMap to texture the furniture with a wooden material.
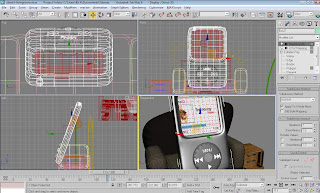
The ipod in my scene was made by making a thin box object and applying a mesh smooth modifier. I selected the polygons that would make up the ipods screen and indented the polys by a few pixels then extruded the polys back into itself. I then applied a second mesh smooth modifier. Using a UVWMap I applied a texture I created in Photoshop to use as the ipods screen. The texture contains the "Technology Channel" title.
For the ipods circular buttons, I made a cylinder with a mesh smooth modifier. Then with the text tool made the "MENU" and the playback symbols to put around the circle.
I kept the colours faithful to the actual ipod design, having the main body being a dark, almost black. While the circle is a slightly darker shade, and the writing on the buttons are white.
The last model used in my scene was the large text displaying the channels title "Technology Channel" that animates to turn and face the camera at the end of the ident.
I didn't use any lights in the scene because the white background created enough glossiness for the scene.
A target spot or omni light would of created too light a scene. There wasn't any benefit in adding lights so I left the scene without any.
I added two cameras to the scene and animated how I wanted the cameras to move to finish the scene.
For the render I changed the size to 800 by 600 like the other ident's and left the default render the same.
No comments:
Post a Comment