Monday 30 March 2009
Sunday 29 March 2009
Adding Sound To The Animation
With the ident animations finished the last part of completing the ident's was too add sound and music. I used a home microphone to record some basic sounds and I spent some time downloading samples to use. I tried to collect a large resource of sounds so I could have a lot to choose from.
For editing the music and the sound effects I used a sound editing program called Audacity which allowed me to import and export sound as I pleases, also allowing me to combine sound together, which was ideal for creating the noise of the city in my third ident as I could put sounds of subway trains, car horns, people talking and combine it into one sound.
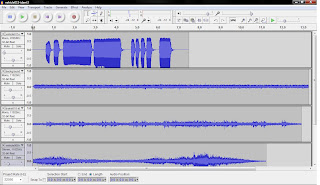
The sound effects was what I concentrated on first before the background music.
For my first ident which has the spaceship flying through space and falling into a lake on Earth required a few sound effects, mainly the sound of the spaceship as it flies through space, the sound of it falling and the sound of splashing water.
Other possible background sounds could be bird noises to give a sense of realism.
The background music that plays throughout the ident was one I chose because the music is quite mysterious and futuristic. I thought this would suit the spaceship scene the best.
The second ident which has the bedroom scene, with the spaceship flying through the room, through the computer and blowing it up. causing the computer to set on fire.
I looked into a lot of different samples for this scene as it required quite a few. I wanted a sound for the computer as it flies, a sort of warping sound as it enters the computer, background computer noise whilst inside the computer, an explosion when the spaceship crashes and the sound of fire when the computer is set on fire. The background music was kept quiet on this ident as the sound effects played a bigger part within the scene.
Other background noises I wanted to include were cars passing by, birds tweeting etc. Just to build a sense of realism within the scene.
My third ident involves the spaceships attacking a city. then zooming out to reveal an iPod in space playing this as a video game.
The main sound effects I used within this scene was the explosions and laser beams of spaceships attacking the city. I also included some background city noise to make the city seem alive.
Once the scene changes to the iPod playing the video game, I kept the sound of the laser beams playing.
The background music doesn't really play a part until the space scene where I use the same mysterious and futuristic music. This also creates a consistency between the ident's with the music.
The main programs I used at this stage, for editing and rendering the video with the audio were Audacity and Adobe Premier Pro.
Sunday 22 March 2009
Evaluation And Changes Made To Idents
Once all my animations for each scene had been rendered out and edited together in windows movie maker the final animations were far too long to be used as a television ident. They were advert length. Although I was very happy with my models and scenes in general there were some inconsistencies. Such as the font used for the title "Technology Channel" appeared to be different in one of the ident's.
I made significant changes to my first ident animation as it was too long. I cut the fist scene where the "Technology Channel" is displayed as if on the side of a spaceship, because I was now going to put the title at the end of the animation. Also the font was different in this scene to the others, which caused inconsistency.
I also cut out the second animation of the spaceship as I thought this wasn't needed.
I slightly speeded up the camera animations as well. I speeded up the length the spaceship takes to reach the planet and fall into the sea. Also I removed two of the cameras and kept just one to make it simple and less confusing as to what is happening.
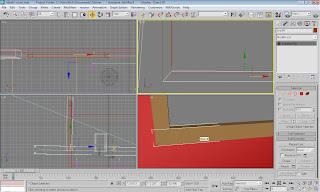
The major change in this ident is the end, after the spaceship has fallen into the sea the "Technology Channel" title comes out of the water. I initially wanted the font to have a water texture like the sea but this made it difficult to read and I wanted to keep the title colours the same in each ident to keep it consistent.
The only difference with this title compared to the other ident's is that
the font bends. I did this because I thought it seemed more organic and natural within the water environment. It also fits better within the camera view without having to zoom out too far.
The problem with the second ident was that it was also too long and was confusing. In the first bedroom scene I made the camera static and made the spaceship that is seen inside the computer, fly from behind the camera through the bedroom, causing the bed sheets to wave. Then flying into the computer itself.
From here I removed one of the cameras within the computer scene as it was confusing for the viewer and took up too much time.
I then shorted the length of time it took for the spaceship to hit the end of the computers motherboard.
The scene changes back to the bedroom scene where the camera is now static and flames consume the computer and rise into the air.
This time the fire doesn't break out on the monitor as well because I changed the blue screen background to the "Technology Channel" title and I didn't want the title obscured by the fire.
The last ident didn't seem to fit properly together with the theme of the first two ident's. The last scene of the ident showed a bright white background with the "Technology Channel" title displayed boldly above an ipod playing a video game. I liked this idea in general as I thought this showed the theme of technology quite well, so I decided to keep it as a whole but with some aspects changed to fit in with an earlier ident. This kept a more consistent theme.
I changed the background white colour, which I thought to be the main inconsistency, and changed it to the space background seen in an earlier ident.

I also animated the bits of furniture in the scene to float up and down as if drifting through space.
Some changes were also made to the city scape scene. I added different textures, more variation on the buildings and an animated city which looks more lively with cars and a subway train. The small spaceship which crashes into the city below also causes a small dust explosion.
I made significant changes to my first ident animation as it was too long. I cut the fist scene where the "Technology Channel" is displayed as if on the side of a spaceship, because I was now going to put the title at the end of the animation. Also the font was different in this scene to the others, which caused inconsistency.
I also cut out the second animation of the spaceship as I thought this wasn't needed.
I slightly speeded up the camera animations as well. I speeded up the length the spaceship takes to reach the planet and fall into the sea. Also I removed two of the cameras and kept just one to make it simple and less confusing as to what is happening.
The major change in this ident is the end, after the spaceship has fallen into the sea the "Technology Channel" title comes out of the water. I initially wanted the font to have a water texture like the sea but this made it difficult to read and I wanted to keep the title colours the same in each ident to keep it consistent.
The only difference with this title compared to the other ident's is that
the font bends. I did this because I thought it seemed more organic and natural within the water environment. It also fits better within the camera view without having to zoom out too far.

The problem with the second ident was that it was also too long and was confusing. In the first bedroom scene I made the camera static and made the spaceship that is seen inside the computer, fly from behind the camera through the bedroom, causing the bed sheets to wave. Then flying into the computer itself.

From here I removed one of the cameras within the computer scene as it was confusing for the viewer and took up too much time.
I then shorted the length of time it took for the spaceship to hit the end of the computers motherboard.
The scene changes back to the bedroom scene where the camera is now static and flames consume the computer and rise into the air.
This time the fire doesn't break out on the monitor as well because I changed the blue screen background to the "Technology Channel" title and I didn't want the title obscured by the fire.

The last ident didn't seem to fit properly together with the theme of the first two ident's. The last scene of the ident showed a bright white background with the "Technology Channel" title displayed boldly above an ipod playing a video game. I liked this idea in general as I thought this showed the theme of technology quite well, so I decided to keep it as a whole but with some aspects changed to fit in with an earlier ident. This kept a more consistent theme.
I changed the background white colour, which I thought to be the main inconsistency, and changed it to the space background seen in an earlier ident.

I also animated the bits of furniture in the scene to float up and down as if drifting through space.

Some changes were also made to the city scape scene. I added different textures, more variation on the buildings and an animated city which looks more lively with cars and a subway train. The small spaceship which crashes into the city below also causes a small dust explosion.

Ident 3
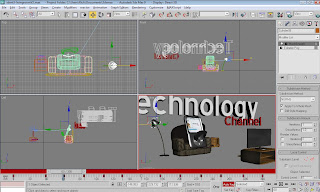
My third ident consists of two different scenes. The first shows a city under attack by a party of small spaceships, one of which falls into the city. The second scene zooms out of the city and shows a television and game console revealing the city under attack to be a video game. The scene shows a plain white background with an ipod sitting on a sofa playing the video game. The "Technology Channel" title is also displayed above the whole scene.
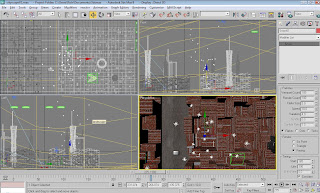
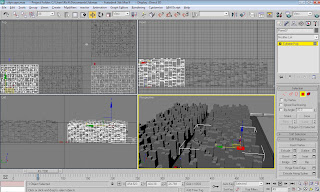
The cityscape was the first thing I created for my ident. I created a plane with eight segments in each direction and converted it to an editable poly. This allowed me to select polygons and pull them up to different levels to create a block of small buildings. A third party plug in called "Greeble" was also quite good in adding small bits of detail on the buildings and also made creating the buildings from the planes much more efficient. I copied the plane several times to create a large scale city scape.
To break up the buildings I created some custom skyscraper buildings which would stand out against all the lower buildings. I also set these to be a different colour from the rest of the buildings. To make the city seem more alive I added a subway train line around the edge of the city which would have a train circling the tracks. It was made by creating a plane that fitted the edge of the city, boolean a hole
so it would fit and then indented the polys facing upwards and extruded them downwards to create the tracks. The train itself is a simple design, a box object with some added segments and a mesh smooth modifier. Also by extruding the bottom polygons on the rear side of the train this creates the train buckle which attaches the carriages together. I cloned the train twice and added them in a line.
A chrome material gives the train a realistic sleek metallic look.
I added small spheres that have been scaled length ways slightly and textured with different colours as cars that will drive along in between the city buildings. Along with the train I thought this gave the city a much more natural feel.
The next step was to create the spaceships that will fly over the city. To keep a consistency between the other ident's I imported the spaceship I modelled in my second ident and cloned it several times to create a fleet of spaceships. Resizing them was the only step I need to take to get them into position. Grouping the spaceships together as one made it easier to animate them all at the same time as well.
As the spaceships fly over the city, one of them falls from the sky and falls into the city below.
To finish the cityscape scene I added a bright sky background to the scene and created a hilly landscape to go around the city instead of the landscape being flat and unrealistic. The landscape was created using the same method in the first ident. Creating the map within Photoshop or using a noise map on the displace modifier then by changing the strength you can create the landscape. A mesh smooth modifier smooths the landscape out.
From here the scene zooms out into the next part of the ident where we see the city and spaceships was just a video game been played by an ipod sitting on a sofa.
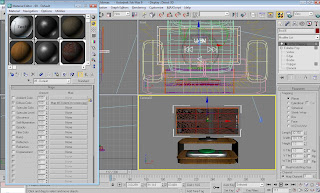
The furniture in this scene was made from planes and boxes and not all that complicated. The television was made very similar to how I made the computer screen in my second ident. By creating a large thin box object, indenting the centre polygons and extruding back into itself.
I saved a still render of the spaceships attacking the city and loaded it back into 3DS MAX as a texture used for the television screen.
UVWMapping was used to fit the texture onto the screen properly.
The item of furniture holding the TV was made from cloning a mesh smoothed thin box object multiple times and putting them back into position.
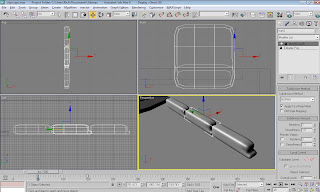
The lamp is made from a thin cylinder with a bend modifier to make it lean over to one side, the lampshade is made from a cylinder being bevelled.
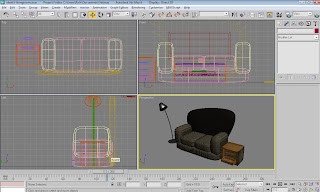
The sofa was made using multiple box objects and applying mesh smooth modifiers to make them appear soft. The back to the sofa was made using the pen tool as I wanted an odd/cartoon like shape for the back of the sofa.
I used the smooth settings with pen tool and then converted the completed spine into a polygon, which I extruded and then capped the other side so the backside wasn't see through.
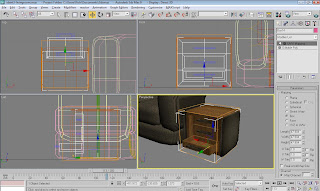
The little table by the side of the sofa was made in a similar way to the TV furniture. the only difference is the the drawers. These were made by selecting the polygons in a row and indenting then extruding. For the bottom draw I extruded the polygons out and then selected the polygon facing upwards and indented a few pixels then extruded down in on itself creating the draw space. The handles were
thin box objects that were then booleaned in the middle to create the handle. I used a UVWMap to texture the furniture with a wooden material.
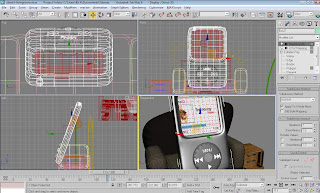
The ipod in my scene was made by making a thin box object and applying a mesh smooth modifier. I selected the polygons that would make up the ipods screen and indented the polys by a few pixels then extruded the polys back into itself. I then applied a second mesh smooth modifier. Using a UVWMap I applied a texture I created in Photoshop to use as the ipods screen. The texture contains the "Technology Channel" title.
For the ipods circular buttons, I made a cylinder with a mesh smooth modifier. Then with the text tool made the "MENU" and the playback symbols to put around the circle.
I kept the colours faithful to the actual ipod design, having the main body being a dark, almost black. While the circle is a slightly darker shade, and the writing on the buttons are white.
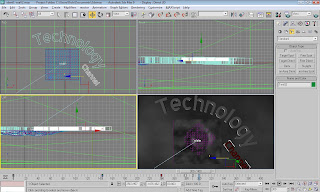
The last model used in my scene was the large text displaying the channels title "Technology Channel" that animates to turn and face the camera at the end of the ident.
I didn't use any lights in the scene because the white background created enough glossiness for the scene.
A target spot or omni light would of created too light a scene. There wasn't any benefit in adding lights so I left the scene without any.
I added two cameras to the scene and animated how I wanted the cameras to move to finish the scene.
For the render I changed the size to 800 by 600 like the other ident's and left the default render the same.
The cityscape was the first thing I created for my ident. I created a plane with eight segments in each direction and converted it to an editable poly. This allowed me to select polygons and pull them up to different levels to create a block of small buildings. A third party plug in called "Greeble" was also quite good in adding small bits of detail on the buildings and also made creating the buildings from the planes much more efficient. I copied the plane several times to create a large scale city scape.

To break up the buildings I created some custom skyscraper buildings which would stand out against all the lower buildings. I also set these to be a different colour from the rest of the buildings. To make the city seem more alive I added a subway train line around the edge of the city which would have a train circling the tracks. It was made by creating a plane that fitted the edge of the city, boolean a hole
so it would fit and then indented the polys facing upwards and extruded them downwards to create the tracks. The train itself is a simple design, a box object with some added segments and a mesh smooth modifier. Also by extruding the bottom polygons on the rear side of the train this creates the train buckle which attaches the carriages together. I cloned the train twice and added them in a line.
A chrome material gives the train a realistic sleek metallic look.

I added small spheres that have been scaled length ways slightly and textured with different colours as cars that will drive along in between the city buildings. Along with the train I thought this gave the city a much more natural feel.
The next step was to create the spaceships that will fly over the city. To keep a consistency between the other ident's I imported the spaceship I modelled in my second ident and cloned it several times to create a fleet of spaceships. Resizing them was the only step I need to take to get them into position. Grouping the spaceships together as one made it easier to animate them all at the same time as well.
As the spaceships fly over the city, one of them falls from the sky and falls into the city below.
To finish the cityscape scene I added a bright sky background to the scene and created a hilly landscape to go around the city instead of the landscape being flat and unrealistic. The landscape was created using the same method in the first ident. Creating the map within Photoshop or using a noise map on the displace modifier then by changing the strength you can create the landscape. A mesh smooth modifier smooths the landscape out.
From here the scene zooms out into the next part of the ident where we see the city and spaceships was just a video game been played by an ipod sitting on a sofa.
The furniture in this scene was made from planes and boxes and not all that complicated. The television was made very similar to how I made the computer screen in my second ident. By creating a large thin box object, indenting the centre polygons and extruding back into itself.
I saved a still render of the spaceships attacking the city and loaded it back into 3DS MAX as a texture used for the television screen.
UVWMapping was used to fit the texture onto the screen properly.

The item of furniture holding the TV was made from cloning a mesh smoothed thin box object multiple times and putting them back into position.
The lamp is made from a thin cylinder with a bend modifier to make it lean over to one side, the lampshade is made from a cylinder being bevelled.
The sofa was made using multiple box objects and applying mesh smooth modifiers to make them appear soft. The back to the sofa was made using the pen tool as I wanted an odd/cartoon like shape for the back of the sofa.
I used the smooth settings with pen tool and then converted the completed spine into a polygon, which I extruded and then capped the other side so the backside wasn't see through.
The little table by the side of the sofa was made in a similar way to the TV furniture. the only difference is the the drawers. These were made by selecting the polygons in a row and indenting then extruding. For the bottom draw I extruded the polygons out and then selected the polygon facing upwards and indented a few pixels then extruded down in on itself creating the draw space. The handles were
thin box objects that were then booleaned in the middle to create the handle. I used a UVWMap to texture the furniture with a wooden material.


The ipod in my scene was made by making a thin box object and applying a mesh smooth modifier. I selected the polygons that would make up the ipods screen and indented the polys by a few pixels then extruded the polys back into itself. I then applied a second mesh smooth modifier. Using a UVWMap I applied a texture I created in Photoshop to use as the ipods screen. The texture contains the "Technology Channel" title.
For the ipods circular buttons, I made a cylinder with a mesh smooth modifier. Then with the text tool made the "MENU" and the playback symbols to put around the circle.
I kept the colours faithful to the actual ipod design, having the main body being a dark, almost black. While the circle is a slightly darker shade, and the writing on the buttons are white.

The last model used in my scene was the large text displaying the channels title "Technology Channel" that animates to turn and face the camera at the end of the ident.
I didn't use any lights in the scene because the white background created enough glossiness for the scene.
A target spot or omni light would of created too light a scene. There wasn't any benefit in adding lights so I left the scene without any.
I added two cameras to the scene and animated how I wanted the cameras to move to finish the scene.
For the render I changed the size to 800 by 600 like the other ident's and left the default render the same.
Ident 2
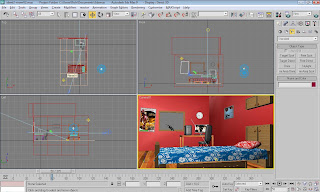
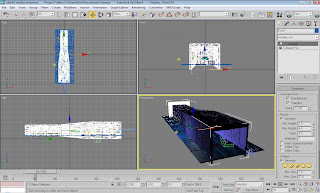
For my second ident I wanted to create three scenes. One being a bedroom scene where a camera flies through the bedroom and zooms into the computer, and from there the second scene shows a spaceship flying through the insides of the computer and crashes into the motherboard causing an explosion. The third scene zooms out of the computer and shows it on fire, an error message on the screen also goes up in
flames.
To start creating my scene I placed two planes down, one as the floor and the other as the side wall. The third wall is a thin box object. The reason I made this a box and not a plane was because I wanted to boolean a hole as a window on this wall. Using the line tool I made a wooden box area around the window and cloned it three times resizing it and placing them around the window, making the window appear more
realistic.
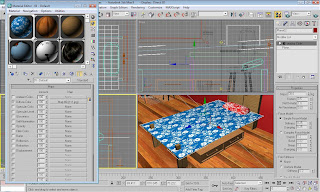
The computer desk, bed and shelving units were made by editing polys of box's, indenting the front polys and extruding back to make the cupboards. The handles were made by small spheres. For the bed covers and pillow I wanted to look soft so for the pillow I applied a mesh smooth texture, tweaking the amount of segments to get the right look. The bed covers were made by a cloth reactor modifier which I
applied to a plane. This causes the plane to become like fabric and flop over a surface underneath it. I applied a high amount of segments on the fabric plane so the cloth realistic folds over the surface below. Also making sure not to put in too many otherwise the fabric doesn't stay on the surface. I found a texture on the internet that I thought would suit the bed covers and pillow.
When making the computer screen I made a thin rectangle box object and indented the middle and extruded the polys backwards to create the screen. With the right amount of segments within the box object the mesh smooth modifier only applies a slight rounded effect which suits the computer monitor. For the desktop background on the computer I screen I print screened my own personal desktop background, resized the
image within Photoshop and applied it as a texture to the screen polys. The stand was created by applying a meshsmooth modifier on a thin cylinder with a small box connecting it to the screen.
The actual computer is another box with a mesh smoother modifier applied to create a rounded effect. The disk drives and buttons were box and cylinder shapes.
The keyboard was a thin rectangle shaped box object indented in the middle and extruded back, also with a mesh smooth modifier applied.
The mouse was a small sphere scaled length ways and mesh smoothed. The desk chair is also a collection of box objects with mesh smooth applied.
For extra effect I added a bin under the desk, which I made by bevelling and indenting along with a mesh smooth.
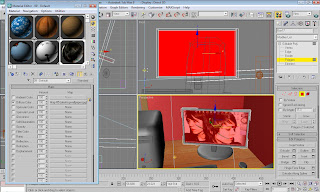
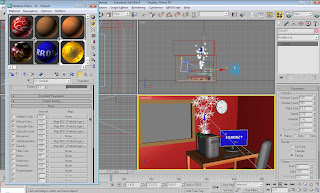
As the room is a bedroom I wanted to put some things on the wall to take up the bare space and make it appear lived in. I added a clock and two posters to the wall. The two posters were made by putting a thin box with an indented and extruded centre where the texture was placed, similar to the computer screen. The images used were items I had created myself, one poster being a fictional magazine I created and the
other being a photograph of a book taken close up.
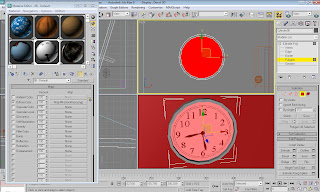
The wall clock was done in the same way only using a thin cylinder instead of a box. I found the texture for the clock on the internet.
The next scene in the ident was to show a spaceship flying through the computer and crashing into the computers motherboard at the end.
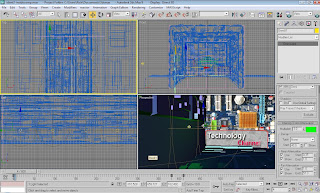
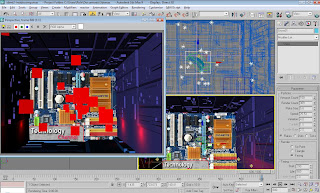
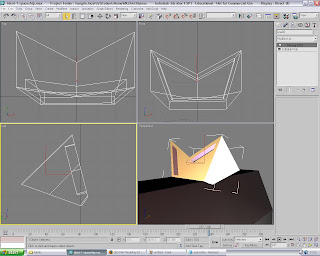
I made a tunnel out of a hollowed out box object, turning the object into an editable poly allowed me to change the shape of the tunnel, making it narrower towards the end. placing a plane underneath the tunnel to close it off completes the initial shape.
Inside the tunnel to make it look like the insides of a computer, I created odd blocks, fans and cables with custom textures I made myself, or downloaded from the internet. Also on the plane and tunnel object I applied the third party plug in "Greeble" to create notches and panels along the walls and floor to make it appear like a computers insides. Detail about the "Greeble Plug-in" can be found in the
evaluation of my first ident.
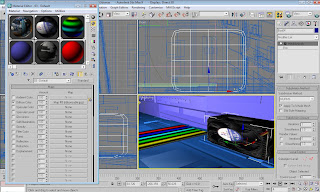
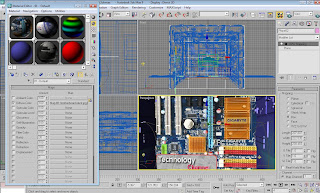
I found a good hi resolution photograph of a computer's motherboard I used as a texture for the polygon at the end of the tunnel, where the spaceship will crash in to. I resized the image within Photoshop and added the "Technology Channel" title as well. when applying the texture I used a UVWMap modifier to have more control over the size and parameter's of the texture.
The hardest part of creating this scene was lighting everything as I wanted. This was made difficult because everything was inside a tunnel. Applying shadows to the lights became impossible due to large amounts of unrealistic shadows covering large parts of the tunnel or completely turning the screen black.
I used a target spot light as a base and used some omni lights within the tunnel itself. The omni lights I turned green and resized the brightness and the attenuation so they only lit up themselves as small lights rather than lighting the whole scene. Using the time line I was able to turn the lights from green to red once the spaceship has flown through the end of the tunnel and caused the explosion.
The final part of the scene was to create the spaceship that was going to fly through the bedroom into the computer, fly through the tunnel and into the end motherboard texture.
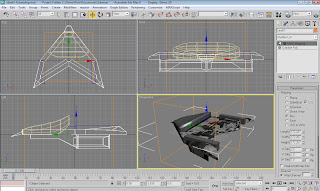
The spaceships body was made using the pen tool to mark out the shape and turned into an editable poly to extrude the shape into 3D. The booster sections at the back end of the ship were made by indenting the polygons and bevelling the polys backwards. The cockpit area was a box object reshaped and a mesh smooth modifier applied.
The texture used for the ships body is a texture I found on the internet which I thought would look good as the ships body. I applied a UVWMap modifier on the spaceship to get the texture to look correct. The parameters were changed to "box" and the U and V tiles changed to 2.0
I imported this object into the scene and animated it via the time line to fly to the end of the tunnel. From this point I added a particle emitter "snow" which would look like a digital explosion within the computer. Under the parameters I changed the render count of particles to 390 and the flake size to 5.0 as I wanted there to be quite a lot, but not be too big to take up the entire screen. The 'start' and 'life' options make the particles start emitting depending on the frame number.
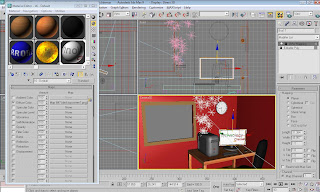
The last scene of the second ident shows the camera zooming out of the computer back into the bedroom. The computer starts to set on fire and the computer screen shows a blue screen error message. The computer screen then sets on fire. I changed the background sky picture in this scene as well to indicate some time had passed.
I placed a snow particle emitter inside the computer and turned it upwards to it would shoot the particles towards the sky. I then changed the parameters, such as the size of the flakes, and the shape and colour to make it appear as fire. I then changed how long and how big the particles would become over a set amount of time.
In the material library I created the texture of the fire and smoke by changing the parameters under diffuse colour, specular colour, specular level, self illumination and opacity, all with particle age maps.
Within these maps I was able to add noise and gradient maps to create a realistic fire colour and texture, also to make the fire turn to smoke as it went higher.
For rendering I changed the default render to 'mental ray' rendering as this gave a much clearer and more defined render with ray traced shadows turned on.
flames.
To start creating my scene I placed two planes down, one as the floor and the other as the side wall. The third wall is a thin box object. The reason I made this a box and not a plane was because I wanted to boolean a hole as a window on this wall. Using the line tool I made a wooden box area around the window and cloned it three times resizing it and placing them around the window, making the window appear more
realistic.

The computer desk, bed and shelving units were made by editing polys of box's, indenting the front polys and extruding back to make the cupboards. The handles were made by small spheres. For the bed covers and pillow I wanted to look soft so for the pillow I applied a mesh smooth texture, tweaking the amount of segments to get the right look. The bed covers were made by a cloth reactor modifier which I
applied to a plane. This causes the plane to become like fabric and flop over a surface underneath it. I applied a high amount of segments on the fabric plane so the cloth realistic folds over the surface below. Also making sure not to put in too many otherwise the fabric doesn't stay on the surface. I found a texture on the internet that I thought would suit the bed covers and pillow.

When making the computer screen I made a thin rectangle box object and indented the middle and extruded the polys backwards to create the screen. With the right amount of segments within the box object the mesh smooth modifier only applies a slight rounded effect which suits the computer monitor. For the desktop background on the computer I screen I print screened my own personal desktop background, resized the
image within Photoshop and applied it as a texture to the screen polys. The stand was created by applying a meshsmooth modifier on a thin cylinder with a small box connecting it to the screen.

The actual computer is another box with a mesh smoother modifier applied to create a rounded effect. The disk drives and buttons were box and cylinder shapes.
The keyboard was a thin rectangle shaped box object indented in the middle and extruded back, also with a mesh smooth modifier applied.
The mouse was a small sphere scaled length ways and mesh smoothed. The desk chair is also a collection of box objects with mesh smooth applied.
For extra effect I added a bin under the desk, which I made by bevelling and indenting along with a mesh smooth.
As the room is a bedroom I wanted to put some things on the wall to take up the bare space and make it appear lived in. I added a clock and two posters to the wall. The two posters were made by putting a thin box with an indented and extruded centre where the texture was placed, similar to the computer screen. The images used were items I had created myself, one poster being a fictional magazine I created and the
other being a photograph of a book taken close up.
The wall clock was done in the same way only using a thin cylinder instead of a box. I found the texture for the clock on the internet.

The next scene in the ident was to show a spaceship flying through the computer and crashing into the computers motherboard at the end.
I made a tunnel out of a hollowed out box object, turning the object into an editable poly allowed me to change the shape of the tunnel, making it narrower towards the end. placing a plane underneath the tunnel to close it off completes the initial shape.
Inside the tunnel to make it look like the insides of a computer, I created odd blocks, fans and cables with custom textures I made myself, or downloaded from the internet. Also on the plane and tunnel object I applied the third party plug in "Greeble" to create notches and panels along the walls and floor to make it appear like a computers insides. Detail about the "Greeble Plug-in" can be found in the
evaluation of my first ident.


I found a good hi resolution photograph of a computer's motherboard I used as a texture for the polygon at the end of the tunnel, where the spaceship will crash in to. I resized the image within Photoshop and added the "Technology Channel" title as well. when applying the texture I used a UVWMap modifier to have more control over the size and parameter's of the texture.

The hardest part of creating this scene was lighting everything as I wanted. This was made difficult because everything was inside a tunnel. Applying shadows to the lights became impossible due to large amounts of unrealistic shadows covering large parts of the tunnel or completely turning the screen black.
I used a target spot light as a base and used some omni lights within the tunnel itself. The omni lights I turned green and resized the brightness and the attenuation so they only lit up themselves as small lights rather than lighting the whole scene. Using the time line I was able to turn the lights from green to red once the spaceship has flown through the end of the tunnel and caused the explosion.

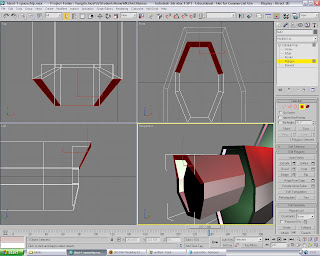
The final part of the scene was to create the spaceship that was going to fly through the bedroom into the computer, fly through the tunnel and into the end motherboard texture.
The spaceships body was made using the pen tool to mark out the shape and turned into an editable poly to extrude the shape into 3D. The booster sections at the back end of the ship were made by indenting the polygons and bevelling the polys backwards. The cockpit area was a box object reshaped and a mesh smooth modifier applied.
The texture used for the ships body is a texture I found on the internet which I thought would look good as the ships body. I applied a UVWMap modifier on the spaceship to get the texture to look correct. The parameters were changed to "box" and the U and V tiles changed to 2.0

I imported this object into the scene and animated it via the time line to fly to the end of the tunnel. From this point I added a particle emitter "snow" which would look like a digital explosion within the computer. Under the parameters I changed the render count of particles to 390 and the flake size to 5.0 as I wanted there to be quite a lot, but not be too big to take up the entire screen. The 'start' and 'life' options make the particles start emitting depending on the frame number.

The last scene of the second ident shows the camera zooming out of the computer back into the bedroom. The computer starts to set on fire and the computer screen shows a blue screen error message. The computer screen then sets on fire. I changed the background sky picture in this scene as well to indicate some time had passed.
I placed a snow particle emitter inside the computer and turned it upwards to it would shoot the particles towards the sky. I then changed the parameters, such as the size of the flakes, and the shape and colour to make it appear as fire. I then changed how long and how big the particles would become over a set amount of time.
In the material library I created the texture of the fire and smoke by changing the parameters under diffuse colour, specular colour, specular level, self illumination and opacity, all with particle age maps.
Within these maps I was able to add noise and gradient maps to create a realistic fire colour and texture, also to make the fire turn to smoke as it went higher.

For rendering I changed the default render to 'mental ray' rendering as this gave a much clearer and more defined render with ray traced shadows turned on.
Ident 1
My idea for the first ident was to create a spaceship which flew through space to planet Earth, falling through the sky and crash landing into a lake.
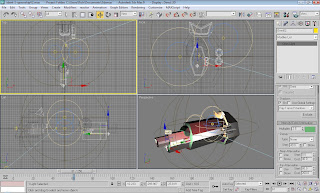
To begin creating my spaceship I first researched what sort of ship I wanted to create. I preferred the idea of a large ship rather than a smaller fighter-like ship.
I began creating the main body and hull of the ship by using the pen tool to mark out the initial shape, then by converting the shape into an editable poly I could extrude the shape into a full body. I cloned this shape and scaled it smaller and placed this shape in front of the main body. I did this again to create the cockpit area of the spaceship.
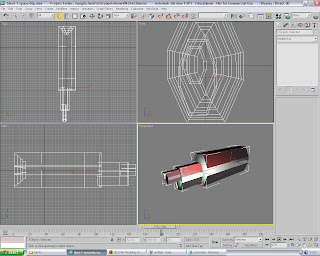
For the back end of the spaceship I selected the polygon and indented it, then bevelled it several times to create the spaceship's rocket exhaust area.
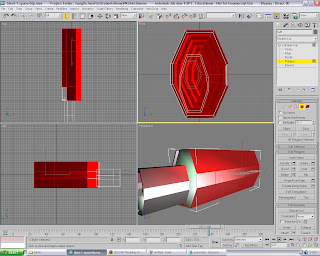
With the basis of the ship complete, I needed to add more detail and odd bits to the object to break up the basic shape of the ship. I created two cylinders with fewer segments to make the object less round and turned it into an editable poly where I indented and extruded the front polygon back slightly and applied a smooth modifier. I placed a four of these along the side of the spaceship to add more detail.
I then added other different parts to the ship to make it appear more futuristic and space-like by creating objects with either the pen tool or by editing polys on basic shapes.
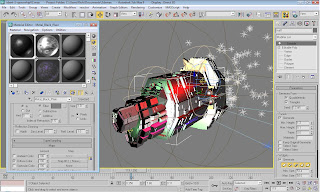
Now that the spaceship structure had been complete I was able to texture and light the ship. As I wanted the ship to look futuristic and space-like I wanted some colourful lights in different areas of the ship. This also helped in breaking up the metallic look and shape of the object.
I got the lighting effect I wanted by using several omni lights in specific areas with a target spot light as a basic background of light. I turned the shadows off on the target light editor because the ship would cast an unrealistic shadow on the background image.
I added several omni lights to the scene and placed them in the positions I wanted. I selected shadows to be turned on and to use Ray Traced Shadows. also, under the intensity/colour/attenuation menu I changed the multiplier to 2.5 because I wanted the colour to be quite bright. The colour was set to dark green.
For the ship I wanted a metallic/chrome effect texture, as I thought this is conventionally the standard colour for spaceships and it will create a good contrast with the omni lights. I added the materials "Black Plain" and "Chrome Fast" for the spaceships body.
Finally to finish the texture and detail of the ship I wanted to add an image of a spaceships body to my object, however I came across a 3rd party plug-in for 3DS MAX 8 which allows the user to add small or large panels and small widgets to an object via a modifier. The plug-in named "Greeble" was available freely from the 3rd party's website (http://www.cgindia.org/2006/11/download-greeble-r9-plug-in-for-3ds.html) and shows various examples of how the plug could be used Specificity in architectural modelling, buildings/cityscapes/armour plating for example.
I applied the "Greeble" plug-in to my own model and tweaked the various settings, from the minimum and maximum size of the panels and the smaller more detailed widgets. Furthermore by increasing the density under the menus properties I was able to create a much more detailed and realistic texture on my spaceship. However the higher the density the higher the rendering times and processing power needed becomes.
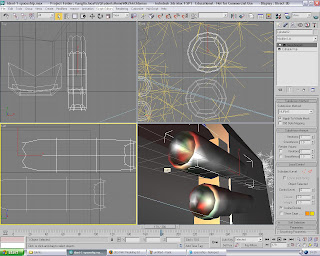
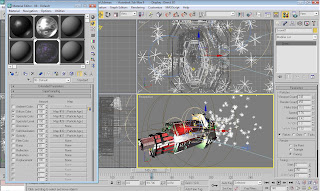
The last part of creating the spaceship involved making the exhaust/flames that would power the ship. I set up a "snow" particle emitter at the rear end of the ship so the particles would emit out of the exhaust area I had created previously.
Inside the particle emitter's properties I changed the render count to 458 to create a lot of particles. I changed the flake size to 15.0 so they were quite large and would look more like flame and smoke. I also tweaked the speed and variation slightly.
the longest aspect of the particle emitter was creating the texture to put on it. I wanted the particles to have a blue/white texture to them as it is more space-like than red flames.
The texture consisted of created particle age maps on the diffuse colour, specular colour, specular level, self-illumination and opacity maps. Inside the first two particle age maps I set the colour with noise maps. For the remaining particle age maps I set gradient maps inside.
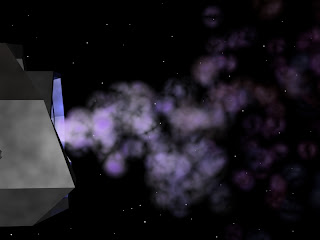
To finish the spaceship scene I added a background created within Photoshop of black space and some stars, along with a camera to animate around the ship.
The next part of the ident was to have the spaceship flying towards planet earth. This was created quite quickly by creating a large sphere with a planet Earth material texture placed on it.
A smaller sphere set behind the largest sphere with a red glow. This sphere is meant to be Mars, or any smaller planet/moon as its primary focus is to add depth to the scene.
I added a target spot light to shine on the top half of the planet earth rendering the rest black. I felt that this gave the scene a more detailed and realistic shadow.
The final scene in the ident involves the spaceship falling from the sky and crashing into the water.
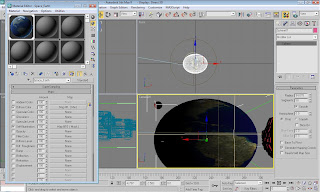
As I wanted the spaceship to react with falling into water realisticly I experimented with the water reactor modifier under the reactor menu. This creates a plain of "reactable" water along with a menu of settings to modify. I increased the length and width of the water plain to make it larger, along with increasing the amount of segments. I also set the depth of the water, so when my spaceship falls into the water it will sink and not float along the waters surface.
There are different properties such as ripple, waves, viscosity and density. As I wanted a large reaction from the water I changed the properties to be quite high. Setting the minimum and maximum ripple options at 200 and 400 respectively, viscosity at 8.0, wave speed at 350, density at 3000 and the depth at 1000.
When my spaceship was imported I added the rigid body reactor to the spaceship and made my spaceship as a "bounding box" under the parameters menu, as well as changing the weight of the ship. When the animation was previewed I was able to see how it would look so I could go back and change the waters parameters to react differently.
Creating the animation converts the reactor animation onto the time line and no longer allows you to tweak the details. One problem I had in particular was getting the water to show up when rendered, because the water plain becomes invisible. It also doesn't allow you to apply a texture to it. The solution was to create a normal plain from the objects panel and set the parameters to the same as the water plain, height, width, segments etc. Apply the desired texture to the new plain and then "Bind" the two plains together using the bind tool. This allows you to view the water reacting in the render window as it would in the preview animation window, along with a more realistic texture.
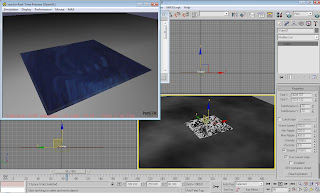
The rest of the landscape was designed by creating a third plain. Making it much larger in width and length to give the effect of a large lake, with the same texture applied as the water reactor plain. The landscape around the lake was created in Photoshop by starting a 1000 by 1000 pixel, black image, and using a soft white brush going round the edge of the image painting in white. Once
in 3DS MAX the white areas will be seen as the areas to raise.
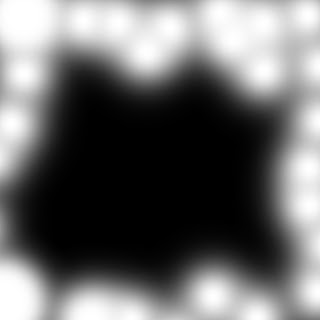
I created another plain and selected a high amount of segments for higher detail. With the displace modifier applied, I could attach my Photoshop image and then raise the "Strength" to make the white areas raise up, creating the surrounding area around the lake. I applied a mesh smooth modifier on the landscape to make it more rounded rather than edgy. A grass texture was then applied to the landscape and placed in position around the lake.
To finish the scene I placed a target spot camera to point at the lake with shadows off. I turned the shadows off because there was no real visible difference with them on, also this increased the render times substantially.
Finally I added a background image of bright sky and clouds under the rendering tab to complete the scene. For rendering out the animations I resized the camera size to 800 by 600 and left the default renderer as it was.
To begin creating my spaceship I first researched what sort of ship I wanted to create. I preferred the idea of a large ship rather than a smaller fighter-like ship.
I began creating the main body and hull of the ship by using the pen tool to mark out the initial shape, then by converting the shape into an editable poly I could extrude the shape into a full body. I cloned this shape and scaled it smaller and placed this shape in front of the main body. I did this again to create the cockpit area of the spaceship.

For the back end of the spaceship I selected the polygon and indented it, then bevelled it several times to create the spaceship's rocket exhaust area.

With the basis of the ship complete, I needed to add more detail and odd bits to the object to break up the basic shape of the ship. I created two cylinders with fewer segments to make the object less round and turned it into an editable poly where I indented and extruded the front polygon back slightly and applied a smooth modifier. I placed a four of these along the side of the spaceship to add more detail.

I then added other different parts to the ship to make it appear more futuristic and space-like by creating objects with either the pen tool or by editing polys on basic shapes.


Now that the spaceship structure had been complete I was able to texture and light the ship. As I wanted the ship to look futuristic and space-like I wanted some colourful lights in different areas of the ship. This also helped in breaking up the metallic look and shape of the object.
I got the lighting effect I wanted by using several omni lights in specific areas with a target spot light as a basic background of light. I turned the shadows off on the target light editor because the ship would cast an unrealistic shadow on the background image.
I added several omni lights to the scene and placed them in the positions I wanted. I selected shadows to be turned on and to use Ray Traced Shadows. also, under the intensity/colour/attenuation menu I changed the multiplier to 2.5 because I wanted the colour to be quite bright. The colour was set to dark green.

For the ship I wanted a metallic/chrome effect texture, as I thought this is conventionally the standard colour for spaceships and it will create a good contrast with the omni lights. I added the materials "Black Plain" and "Chrome Fast" for the spaceships body.
Finally to finish the texture and detail of the ship I wanted to add an image of a spaceships body to my object, however I came across a 3rd party plug-in for 3DS MAX 8 which allows the user to add small or large panels and small widgets to an object via a modifier. The plug-in named "Greeble" was available freely from the 3rd party's website (http://www.cgindia.org/2006/11/download-greeble-r9-plug-in-for-3ds.html) and shows various examples of how the plug could be used Specificity in architectural modelling, buildings/cityscapes/armour plating for example.
I applied the "Greeble" plug-in to my own model and tweaked the various settings, from the minimum and maximum size of the panels and the smaller more detailed widgets. Furthermore by increasing the density under the menus properties I was able to create a much more detailed and realistic texture on my spaceship. However the higher the density the higher the rendering times and processing power needed becomes.

The last part of creating the spaceship involved making the exhaust/flames that would power the ship. I set up a "snow" particle emitter at the rear end of the ship so the particles would emit out of the exhaust area I had created previously.
Inside the particle emitter's properties I changed the render count to 458 to create a lot of particles. I changed the flake size to 15.0 so they were quite large and would look more like flame and smoke. I also tweaked the speed and variation slightly.
the longest aspect of the particle emitter was creating the texture to put on it. I wanted the particles to have a blue/white texture to them as it is more space-like than red flames.
The texture consisted of created particle age maps on the diffuse colour, specular colour, specular level, self-illumination and opacity maps. Inside the first two particle age maps I set the colour with noise maps. For the remaining particle age maps I set gradient maps inside.


To finish the spaceship scene I added a background created within Photoshop of black space and some stars, along with a camera to animate around the ship.
The next part of the ident was to have the spaceship flying towards planet earth. This was created quite quickly by creating a large sphere with a planet Earth material texture placed on it.
A smaller sphere set behind the largest sphere with a red glow. This sphere is meant to be Mars, or any smaller planet/moon as its primary focus is to add depth to the scene.
I added a target spot light to shine on the top half of the planet earth rendering the rest black. I felt that this gave the scene a more detailed and realistic shadow.

The final scene in the ident involves the spaceship falling from the sky and crashing into the water.
As I wanted the spaceship to react with falling into water realisticly I experimented with the water reactor modifier under the reactor menu. This creates a plain of "reactable" water along with a menu of settings to modify. I increased the length and width of the water plain to make it larger, along with increasing the amount of segments. I also set the depth of the water, so when my spaceship falls into the water it will sink and not float along the waters surface.
There are different properties such as ripple, waves, viscosity and density. As I wanted a large reaction from the water I changed the properties to be quite high. Setting the minimum and maximum ripple options at 200 and 400 respectively, viscosity at 8.0, wave speed at 350, density at 3000 and the depth at 1000.

When my spaceship was imported I added the rigid body reactor to the spaceship and made my spaceship as a "bounding box" under the parameters menu, as well as changing the weight of the ship. When the animation was previewed I was able to see how it would look so I could go back and change the waters parameters to react differently.
Creating the animation converts the reactor animation onto the time line and no longer allows you to tweak the details. One problem I had in particular was getting the water to show up when rendered, because the water plain becomes invisible. It also doesn't allow you to apply a texture to it. The solution was to create a normal plain from the objects panel and set the parameters to the same as the water plain, height, width, segments etc. Apply the desired texture to the new plain and then "Bind" the two plains together using the bind tool. This allows you to view the water reacting in the render window as it would in the preview animation window, along with a more realistic texture.
The rest of the landscape was designed by creating a third plain. Making it much larger in width and length to give the effect of a large lake, with the same texture applied as the water reactor plain. The landscape around the lake was created in Photoshop by starting a 1000 by 1000 pixel, black image, and using a soft white brush going round the edge of the image painting in white. Once
in 3DS MAX the white areas will be seen as the areas to raise.

I created another plain and selected a high amount of segments for higher detail. With the displace modifier applied, I could attach my Photoshop image and then raise the "Strength" to make the white areas raise up, creating the surrounding area around the lake. I applied a mesh smooth modifier on the landscape to make it more rounded rather than edgy. A grass texture was then applied to the landscape and placed in position around the lake.
To finish the scene I placed a target spot camera to point at the lake with shadows off. I turned the shadows off because there was no real visible difference with them on, also this increased the render times substantially.
Finally I added a background image of bright sky and clouds under the rendering tab to complete the scene. For rendering out the animations I resized the camera size to 800 by 600 and left the default renderer as it was.
Sunday 15 March 2009
Mood Board Update
Over the past few weeks using my mood boards at inspiration I started to create some basic scenes within 3DS MAX. During the development of my scenes I started to gain more in depth ideas about what I wanted to create and thought id concentrate on some ideas and bring them more to life with additional mood boards to use as reference and inspiration.
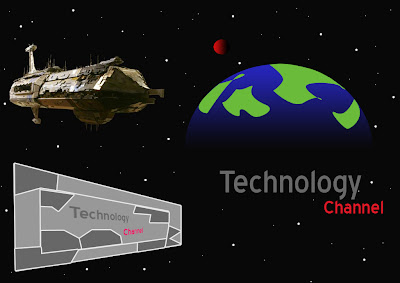
My first mood board for my fictional technology channel shows an outer space scene, populated with a large planet (Earth) with a much smaller planet behind it to give more depth to the scene.
An advanced alien spaceship is shown to be flying towards the planet. The Technology Channel title
is show along the side of a close up image of the flying spaceship.
The idea behind this mood board was that Earth is being scouted by an advanced alien culture. Something disastrous happens to the alien ship upon coming into the earth's atmosphere and the vessel crashes. the remains are quickly hidden away by earth's governments and thus is the reason for all of earth's advanced technology.
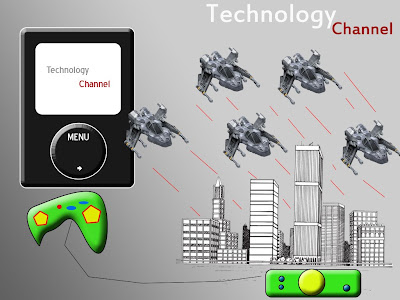
My second mood board captures an Ipod/music player like device playing on a gaming console. the image next to this is a cityscape being attacked and destroyed by large invading alien fleet.
With this mood board I wanted to continue the theme of advanced technology becoming intelligent and turning against its makers. within my animation I want to create the city being attacked by multiple spaceships, then for the camera to zoom out to show its actually just a video game, being controlled by an Ipod. I thought this would be a clever idea because it carries on my theme of intelligent technology but also shows that they are human in nature because they like to sit on sofas and play video games.
My first mood board for my fictional technology channel shows an outer space scene, populated with a large planet (Earth) with a much smaller planet behind it to give more depth to the scene.
An advanced alien spaceship is shown to be flying towards the planet. The Technology Channel title
is show along the side of a close up image of the flying spaceship.
The idea behind this mood board was that Earth is being scouted by an advanced alien culture. Something disastrous happens to the alien ship upon coming into the earth's atmosphere and the vessel crashes. the remains are quickly hidden away by earth's governments and thus is the reason for all of earth's advanced technology.
My second mood board captures an Ipod/music player like device playing on a gaming console. the image next to this is a cityscape being attacked and destroyed by large invading alien fleet.
With this mood board I wanted to continue the theme of advanced technology becoming intelligent and turning against its makers. within my animation I want to create the city being attacked by multiple spaceships, then for the camera to zoom out to show its actually just a video game, being controlled by an Ipod. I thought this would be a clever idea because it carries on my theme of intelligent technology but also shows that they are human in nature because they like to sit on sofas and play video games.


Subscribe to:
Posts (Atom)