Wednesday, 18 February 2009

Mood Boards

Part of this semesters project requires me to research into television channel idents. and from the research create my own three idents for a fictional or existing TV channel of my choice. I decided to go with a fictional technology focused channel. I came up with different ideas I could have in my idents and made some mood boards in Adobe Photoshop.
The first mood board has a computer that seems to have come to life and is fighting a robot. the computer is hovering in the air and shooting CD ROM discs at the robot, whist the robot shoots red lasers out of its eyes into the computer. I decided to have a simple clear, grey to white gradient effect background so the objects at the front will have more focused. my idea was to make this particular idea quite contemporary.
my second mood board shows a first person perspective camera flying through the inside of a computer. the insides of the computer at first look like buildings within a city, but as the camera progresses through, the computer parts become more clear.
The third and final mood board shows a few different objects that relate to the technology theme and how I could bring them to life. such as the apple macintosh laptop with a face and an arm. also with the desktop icons from the adobe suite along with other icons blasting out in an exciting visual aesthetic. the idea of
the flying saucer I thought would be quite good as it could be animated to fly around the screen, maybe even with aliens inside. I made the background a kind of computerised graph with parts of sleek looking metallic parts to make it look futuristic.


Thursday, 12 February 2009

Morphing

The morph tool works by making a "base" shape. Then creating one or more other shapes with similar vertices.
By then applying the morph modifier to the "base" shape, you can select "pick object from scene" from the Channel Parameters. You can then pick one of the other objects which you want your "base" object to mimic and morph to.
You can then select Auto Key on the timeline and then move to any frame, 30 for example, then using the morph modifier percentage up to 100%. This will then mimic the chosen object 100% over 30 frames. You can change the amount of frames and the percentage it mimics.
When using the morph tool the user must be sure that the "base" shape must have the same amount of vertices as the shape it is mimicking, otherwise it won’t work correctly. This means that you can’t move your "base" shape into a more complex shape.
The morph tool is also really good to use when modelling face shapes and facial expressions. Especially when lip syncing or moving eye brows.

To create my animation, I selected the teapot object as I thought this would be an interesting object to morph during animation. I then changed the teapot into an editable poly. I then cloned three copies of the object and changed them all into editable polys as well. On each of the cloned teapots I changed the way they looked in one way or another, a bigger spout, lid, and handle for example.
I applied the morph modifier to the "base" object and then picked each of the cloned teapots to mimic. With auto-key on the timeline turned on I animated the different parts of the teapot. The animation looks as if the teapot has been hit by some kind of magical spell and has sprung to life briefly.
I added a camera and had it rotate around the animated teapot during the course of the animation. Then I added two different lights coming from two different directions with ray traced shadows turned up to have a nicely rendered effect.


Thursday, 5 February 2009

Assinging Cameras To Paths

Assigning Objects To a Path

Assigning paths to objects is a good way of performing animations.
You use the line tool, set the options to smooth to get smoother movements. The object will then follow the path of the line.
Imagine a rollercoaster train following the tracks.

You can also use a circle line path to make an object go round in a circle, which would be good for animating things like planets in space etc.
The camera can also be assigned to a specific path which is useful for things like fly through.

To create one of these you have to create the object you want, a sphere for example. Then under shapes select the circle line tool or one of the other line tools and put the shape on the stage next to the sphere. Select the sphere object and go to the animation tab at the top and then to Constraints and then to Path Constraint. The sphere object will then automatically snap to the circle path. It also places a key frame at the end of the timeline so it can move around the circle path on a loop.
It is also good to activate the follow and bank options so the camera will bank when turning corners and act more smoothly when it moves. There is also a smoothing option.
I created a floor plan of a building, complete with rooms, doors and windows etc and then used the line tool to create a path around the rooms for which I wanted the camera to follow. I made a camera and snapped it to the path.
I also added up to 600 frames at 25 frames a second. Then moved the key frame up to the 600th frame. This slows down the whole animation so the camera doesn’t fly through the rooms too fast.

I then textured the building and added lighting to make it appear more realistic.

Thursday, 29 January 2009

Semester 2 - Animation


Today I learnt how to animated objects within 3Dsmax using the timeline.
I learnt how to use the auto key mode on the timeline to allow the program to set keys within the timeline automatically. There is also a set key mode where you can manually set the key frames on the timeline for a more precise control over the animation.
Which is better for more detailed animations.
Along with adding keys I also learnt how to edit key frames on the timeline, such as copying, deleting and moving. By holding the shift key and selecting keys you can then move and copy the key frames to another part of the timeline, and if you wish to delete certain frames you just have to right click and choose the delete option.

There is also the Curve editor within 3Dsmax to edit the objects movement in real time whilst the animation is playing. This is a particularly good way of changing the animation and making it flow more naturally. Or you can add steps which can make an object within the animation idle for a certain amount of time.
The doll sheet is another method of editing current animations, this method is effective with lip syncing in particular.
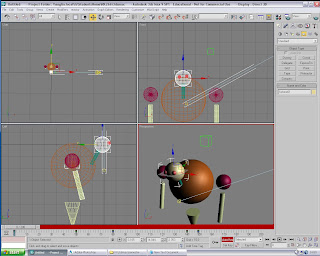

I learnt about a feature within 3Dsmax which allows you to add dummy objects to the stage area. By linking an object within your animation to the dummy object you can move both objects at the same time. The dummy objects are non render able.
The dummy objects are great to use when dealing with complicated objects such as characters when some parts are difficult to access, so by linking them to a dummy object you can manipulate the object with ease.
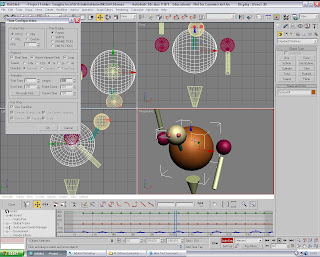

I was also shown how to change the timeline and render settings, so I can change the frame rate, the amount of frames on the timeline (default of 100), and the output file/codec/format.

How I Created My Model and Animation

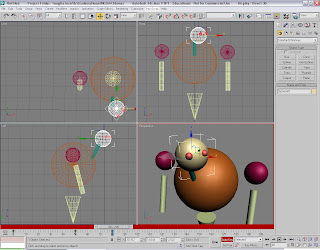
The model itself is made up of very basic shapes made up to look like a character/animal thing that can dance a bit.

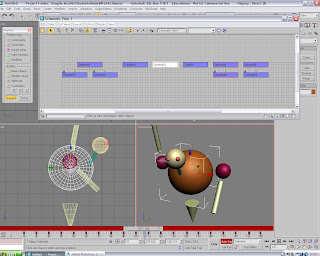
I used the schematic view and the link tool to link different parts of the model together to make it easier to animate. Such as the arm parts to the shoulder parts and the eye models to the head model.
I turned on the auto key feature to move the different parts together to make it appear as if the model is dancing and waving its arms around whilst bouncing up and down.
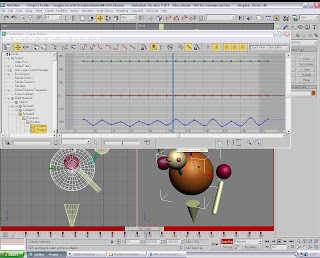
The curve editor was also helpful in editing the different objects animations.
I added 2 lights to the scene to light the model properly and added a camera which swings around the character as it dances. I added the key frames manually for the camera.

Monday, 10 November 2008

3D Guy Fawkes/November Scene

For my Guy Fawkes/November scene I came up the idea of having an outdoor landscape, night sky, a flaming bonfire with silhouettes of people standing around.
To begin creating my scene I first drew out a displacement map image in Photoshop of the shape of the landscape I wanted to use in my scene. I created a plain in 3Ds max and placed a displace modifier on top so I could import my image onto the plain. By increasing the “strength” I was able to produce the landscape, and by increasing the blur and applying a mesh smooth modifier I was able to smoothen the landscape out to be more realistic.


To create my bonfire I first created a pyramid with a wood texture applied. I then used the cylinder and clone tool to make logs to be placed against the pyramid. I placed a second wood texture onto the logs.


Next I wanted to create the fire effect for the bonfire. I spent a large amount of time following help on the internet trying to follow instructions on how to create fire, however I couldn’t get anything to work. So I used the snow particle emitter option and instead of having the snow fall down. I rotated the particle emitter around so it would shoot the snow upwards. I then changed the parameters, such as the size of the flakes, and the shape and colour to make it appear as fire. I then changed how long and how big the particles would become over a set amount of time.


Within the material library I created the texture of the fire and smoke by changing the parameters under diffuse colour, specular colour, specular level, self illumination and opacity, all with particle age maps.
Within these maps I was able to add noise and other effects to create a realistic fire colour and texture, also to make the fire turn to smoke as it went higher.


Like I did with my other scenes I created a large sphere to place my whole landscape within so I could place a sky texture along the inside. The sphere also creates a better light source within the render as well.
I placed a free spot light with ray traced shadows turned on to point at the bonfire area. This however left the background landscape a little too dark, so I added an extra Omni light in the background area to brighten it up slightly.


To finish off my scene I added some leaves textures around the bonfire and some people standing around the fire.

To create the people I made a sphere with low amount of segments and with smooth turned off to give a less perfectly rounded head. A simple box for all the body parts and a sphere for the joints was a simple enough approach as they were only to be used as silhouettes with no detail.


Once I was happy with the overall scene I rendered a few different images from different locations.
These are the final images from my Guy Fawkes/November scene.


Sunday, 9 November 2008

3D Summer Scene

For my June/Summer 3D scene I came up with the idea of having a bright, grassy island with a clear river running through a valley, with trees and a butterfly in the air.
To begin with I first created another hi-res 3000px by 3000px displace map of the shape of the landscape.
I created a plain with plenty of length and width ways segments, with a displace modifier and used the “strength” selection to create the landscape with a mesh smooth modifier on top.


I then created a second plain and placed it just above the base of the landscape. I used this plain as my water object.
To create the water material I scrolled down to the Maps selections and under reflection I chose the flat mirror option. This creates a good reflection surface for the water, but it is too still, so I applied a noise modifier under the bump map section with a size of around 10-15. This creates a realistic enough water surface.


I used the same tree objects from my Halloween scene for the trees in my summer scene. I made a sphere, cut it in half, caped the borders and used soft selection to organically manipulate the polygons into a tree shape. I cloned this tree object a few times and placed them around the island scene.
For my sky I again created a half sphere to place over the whole landscape with a sky texture placed along the inside of the sphere.
I placed a few Omni lights around the scene to try and achieve a bright summers feel to the landscape.
To finish off my summer image I created a butterfly.
For the body and head I created a cylinder and used the bevel tool to create a slim body shape for the butterfly and then placed a mesh smooth modifier on it. For the wings I imported an image of a butterfly into the background and traced the wing shapes with the line tool and extruded the shape out into 3D space.


I tried using UV mapping on the butterflys wings to create a realistic texture by unwrapping the object texture and exporting it out into Photoshop. I then imported the image back into the 3Dsmax and applied the texture to the wing of the butterfly. However I then had a few problems importing the butterfly with the textures into my island scene.
These are my final images for my Summer/June scene