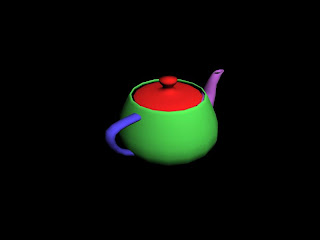
Applying different textures to the same object.
Using a teapot for example. Convert teh teapot to an editable poly. Choose elements
and when under polygon properties select each part of the teapot and click next to Set ID.
Then in the material library under multi-subobject you can assign each numbered part of the object a different colour or texture.

Applying your own textures to objects.
To create your own texture to use within 3dsmax I used photoshop. I created a new 512px by 512px file, and i used filter>render>fibres to create an image that looked like tree bark. All I had to do then was to adjust the hue/saturation to get the right colour. I also used filter>render>difference clouds for other objects.
Once I had my final image I saved it out as a bitmap image. Within 3dsmax I created my object and within the material library I clicked the small box next to the diffuse selection and under bitmap I found my own image.
Once applied to my object I was able to render my object with my own texture.
No comments:
Post a Comment